
Key takeaways
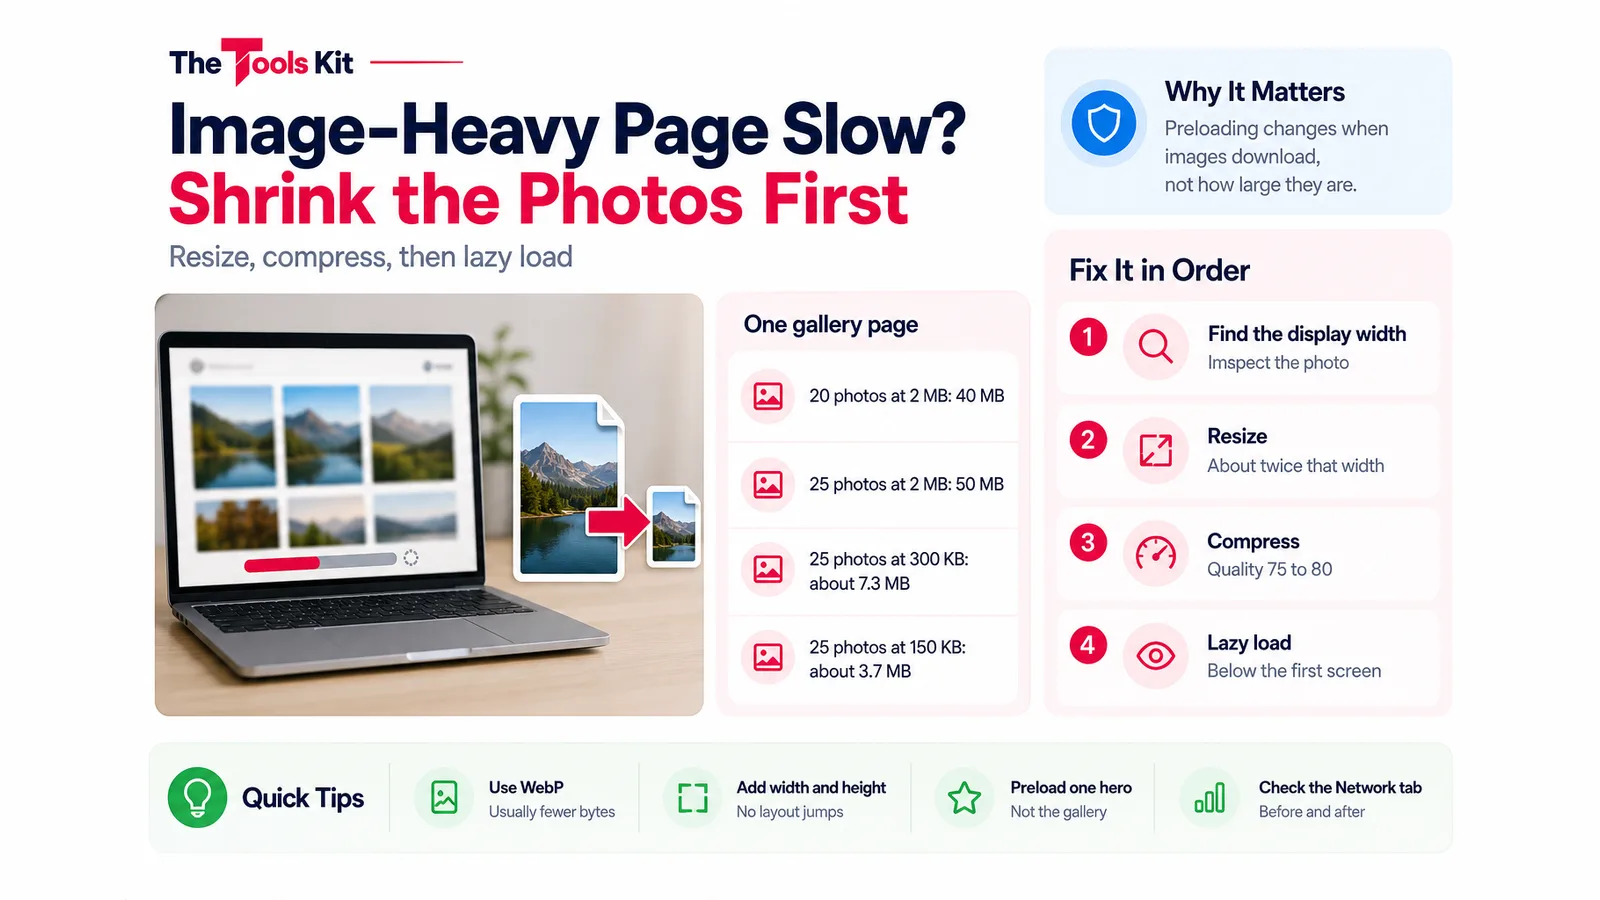
- Preloading changes when images download, not how large they are, so a page of 2 MB photos stays slow until each file is made smaller.
- Resize each photo to about twice its displayed width first, then compress it, because compression on oversized images wastes bytes on unseen pixels.
- Start compression at quality 75 to 80 or set a KB target, and consider WebP, which usually needs fewer bytes than JPEG for photos.
- Add loading=lazy below the first screen, width and height on every image, and preload only the single hero image if it helps.
If a page with 20 to 25 photos at about 2 MB each loads slowly, preloading will not fix it. The page is asking every visitor to download 40 to 50 MB of images, and preloading only moves that download earlier, often onto pages the visitor never opens. The fix is to make each photo smaller first: resize it to the width it is actually shown at, then compress it, ideally as WebP. A gallery photo shown 800 pixels wide rarely needs to be more than a few hundred kilobytes.
This guide covers why the files are the real problem, the order to fix them in, and the few HTML attributes that make the remaining images load sensibly.
Why preloading does not solve a heavy page
Browsers already download images as fast as the connection allows. <link rel="preload"> tells the browser to fetch a file sooner on the current page, and <link rel="prefetch"> asks it to fetch files for a page the visitor might open next. Neither makes a file smaller.
Run the numbers for one gallery page:
| Photos per page | Size each | Total download |
|---|---|---|
| 20 | 2 MB | 40 MB |
| 25 | 2 MB | 50 MB |
| 25 | 300 KB | about 7.3 MB |
| 25 | 150 KB | about 3.7 MB |
Prefetching three such pages from the home page at 2 MB per photo means pushing well over 100 MB to someone who may only look at one of them, and on a phone plan that is their data you are spending. Shrinking the files cuts the cost on every page, for every visitor, whether they arrive from the home page or straight from a search result.
Where the 2 MB comes from
A 2 MB JPEG is usually a photo straight from a phone or camera: several thousand pixels wide, saved at high quality. A typical page layout shows it in a column that is a fraction of that width. The browser downloads every pixel and then throws most of them away when it scales the photo down to fit.
Two things make a photo heavy, and they stack:
- Pixel dimensions. A photo twice as wide has about four times as many pixels to store.
- Encoding. The format and quality setting decide how many bytes each pixel costs. WebP usually stores a photo in fewer bytes than JPEG at similar visual quality, and PNG is the heaviest choice for photographs. Our guide to choosing between JPG, PNG and WebP explains when each one fits.
Fix dimensions first, because compression on an oversized image is working on pixels nobody will see.

The fix, in order
- Find the display width. Open the page, right-click a photo and choose Inspect. The browser shows the size the image is rendered at, for example 800 by 600. That is the width that matters, not the file's original size.
- Resize to about twice that width. Phones and many laptops have high-density screens, so a common rule of thumb is to export at roughly double the displayed width: 1,600 pixels for a photo shown at 800. Going larger than that adds bytes without visible gain. Use the image resizer with Keep aspect ratio switched on so the height follows automatically. It keeps the uploaded format, so a JPG stays a JPG.
- Compress. Run the resized file through the image compressor. JPEG files stay JPEG; PNG, GIF and WebP files are saved as WebP (or JPEG in Safari, which cannot encode WebP). Start with the quality slider at 75 to 80 and compare the preview with the original at full size. If you have a size budget per photo, switch to the target-size mode and enter it in KB; the tool searches for the highest quality that fits.
- Convert JPEGs to WebP if you want the extra saving. The JPG to WebP converter does this in the browser. Every current major browser displays WebP.
- Check the total. Add up the new file sizes for one page. If a gallery page is now a few megabytes instead of tens of megabytes, the slow load is usually gone before you touch any loading code.
All three tools run in your browser, so the photos are never uploaded to The Tools Kit. They work on one file at a time; for a large back catalogue, a build step or your image CDN can apply the same settings automatically, and the tools are a quick way to find the settings that look right first.
Make the remaining images load sensibly
Once each photo is small, a few standard HTML attributes do the rest:
loading="lazy"on images below the first screen. The browser then fetches them as the visitor scrolls toward them instead of all at once. Leave it off the first one or two images that are visible immediately.widthandheighton every<img>. The browser reserves the right space before the file arrives, so the layout does not jump as photos load.srcsetandsizesif you can export two or three widths of each photo. The browser picks the smallest one that is sharp enough for the visitor's screen, so phones download less than desktops.- Preload only the hero image. If one large image at the top of the home page is the first thing people see, a single
<link rel="preload" as="image">for that file can help. Preloading a whole gallery, or prefetching other pages' galleries, mostly wastes bandwidth.
How to tell if it worked
Open your browser's developer tools, go to the Network tab, filter by Img and reload the page with the cache disabled. The bottom bar shows how many megabytes were transferred. Compare that number before and after. For a broader view, a page speed test such as Lighthouse in Chrome's developer tools reports the largest image and flags images that are larger than their display size.
If the page is still slow after the images are small, the cause is somewhere else: a slow server response, large scripts, or web fonts. Those are worth checking next, but heavy photos are the most common culprit on gallery and portfolio pages, and the cheapest one to fix.
Frequently asked questions
Not if the images are large. Preload and prefetch only change when a file is downloaded, not how big it is. A page of 25 photos at 2 MB each is still about 50 MB. Resize and compress the photos first, then preload at most the one hero image people see first.
Export it at about twice the width it is displayed at, so an image shown 800 pixels wide is saved around 1,600 pixels wide, then compress it. A gallery photo prepared this way is usually a few hundred kilobytes rather than several megabytes.
WebP usually stores a photo in fewer bytes than JPEG at similar visual quality, and every current major browser displays it. JPEG is still a fine choice. The bigger win is resizing to the display width and using a sensible quality setting, whichever of the two formats you pick.
No. The image resizer, image compressor and JPG to WebP converter on The Tools Kit run in your browser, so the files stay on your device. They handle one image at a time, which suits testing settings before you apply them across a whole site.